
ASFROM Shoe Sterilization Dryer FAQ
ASFROM Shoe Sterilization Dryer FAQ
Shoe Sterilization Dryer Base Q&A
I. Grundlegende Produktinformationen
Q1: What is the ASJ‑891S Hot Air Circulation Sterilization Chamber?
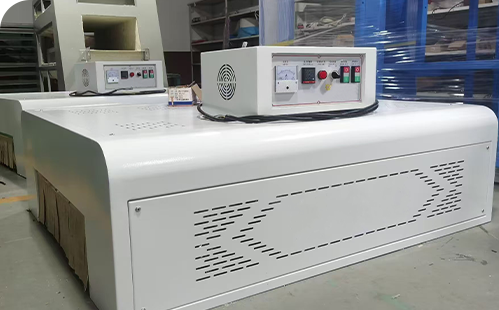
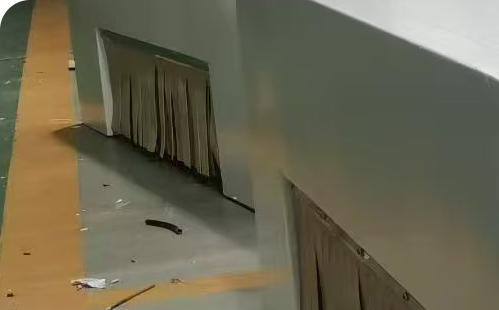
A1: The ASJ‑891S is a compact, easy‑to‑operate unit that combines drying and sterilisation functions. It is primarily designed for shoes – to sterilise, deodorise and dry them, ensuring cleanliness and hygiene while preventing the spread of germs. The machine uses electric heating to dry moisture absorbed by inner boxes and wrapping paper, thus preventing mould growth, and UV germicidal lamps to completely kill existing mould. It occupies minimal floor space.
Q2: What are the core technical specifications of the ASJ‑891S?
A2:The main parameters are:
-
Heating power: 3 kW
-
Germicidal lamp power: 25 W × 6 pcs
-
Fan motor: 1/4 HP × 4
-
Operating temperature: 40 °C – 50 °C
-
Machine dimensions: customised according to customer needs
二.Applicable Industries & Scenarios
Q3: What are the typical applications of the ASJ‑891S?
A3:The unit is mainly used where shoes require disinfection, odour removal and drying. Typical use cases include:
-
Footwear finishing: sterilising and drying finished or semi‑finished shoes before packaging.
-
Mould prevention: drying moisture absorbed by boxes and wrapping paper to eliminate conditions that favour mould.
-
Hygiene control: killing bacteria and viruses on shoe surfaces to prevent cross‑contamination.
三. Working Principle & Structure
Q4:How does the ASJ‑891S achieve sterilisation?
A4:The machine works through a dual action:
-
Hot‑air circulation drying: electric heating elements warm the air, and fans circulate it to dry moisture from boxes and wrapping paper, preventing mould.
-
UV sterilisation: six 25 W germicidal lamps kill any existing mould and microorganisms.
-
Temperature control: the operating range (40 °C – 50 °C) is maintained by a temperature controller that automatically stops heating when the set point is reached.
四.Control Panel & Operation
Q5: What are the main components on the control panel?
A5:The control panel includes:
-
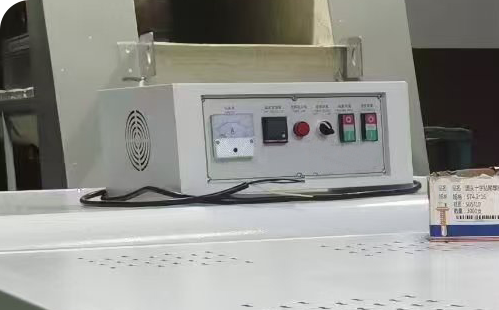
Heating indicator lamp – lights when the heating switch is set to “ON”.
-
Power indicator lamp – lights when the main power switch is “ON”; stays lit during operation.
-
Fan indicator lamp – lights when the fan switch is “ON”.
-
Ammeter – displays the single‑phase current draw.
-
Temperature controller – allows setting the desired temperature; automatically cuts heating when the set point is reached.
-
Heating switch – turns on the heating elements and fan when set to “ON”.
-
Fan switch – turns on the UV germicidal lamps when set to “ON”.
Q6:What is the standard operating procedure for the ASJ‑891S?
A6:The normal start‑up sequence is:
-
Press the “ON” button of the electromagnetic switch on the side of the machine, then turn the control‑panel switch to “ON” – the drive system starts.
-
Turn the main power switch on the control‑box base to “ON” – the power indicator lights.
-
Turn the heating switch to “ON” – the heating indicator lights, and the heaters and fans begin working. Set the desired temperature on the controller.
-
Turn the fan switch to “ON” – the UV lamps start working.
Q7: What safety precautions must be observed during operation?
A7:Important safety rules:
-
Never insert hands or head into the drying chamber while the machine is running – risk of burns.
-
Do not arbitrarily operate the control‑panel switches during normal running.
五.Installation & Preparation
Q8: What are the site and clearance requirements for installation?
A8:The following conditions must be met:
-
Floor: place on a flat, level surface for stability.
-
Front/rear clearance: at least 60 cm on both the front and rear sides for proper operation.
-
Between machines: leave 60 cm between units for air circulation and maintenance.
-
Direction: check the conveying direction indicated on the panel before positioning.
Q9: What are the electrical installation requirements for the ASJ‑891S?
A9:Electrical requirements include:
-
Earthing: the machine must be reliably earthed in accordance with local electrical regulations.
-
Voltage matching: check the voltage on the machine nameplate – the factory supply must match. If not, a technician must modify the wiring.
-
Prohibitions: do not connect the earth wire to gas or water pipes; do not share an earth with another machine that has an earth‑leakage circuit breaker.
-
Recommended: install a no‑fuse breaker on the main supply to protect against short circuits and leakage.
Q10: What pre‑startup checks are required before first use?
A10:Before starting, verify:
-
All screws inside the machine (especially moving parts) are tight – retighten if loose.
-
The phase sequence of the machine’s power cable matches the supply – if not, correct the wiring.
六.Maintenance & Troubleshooting
Q11: What does daily maintenance involve?
A11:Daily checks include:
-
Ensure clearance around the machine and good air ventilation.
-
Verify all switches and electrical components work properly.
-
Keep the machine and its hangers clean during operation.
-
At the end of each shift, turn off all switches and the power system.
Q12: What are the weekly and monthly maintenance tasks?
A12:
-
Weekly:
-
Check motor and reducer operation.
-
Lubricate bearings and chains.
-
Inspect the electrical cabinet for loose or disconnected wires.
-
-
Monthly:
-
Check for paint peeling and rust on the exterior.
-
Clean dust from motor fans and check reducer noise level.
-
Inspect chain links for looseness.
-
Check for electrical leakage.
-
Q13: What lubrication is required for the ASJ‑891S?
A13: Regular lubrication of chains and bearings is essential. Keep them clean and free from debris. Use appropriate oil/grease as specified in the maintenance schedule.
Q14: How do you troubleshoot “machine does not run”?
A14:Follow these steps:
-
Check if power is connected – if not, have it connected by a technician.
-
Inspect electrical wiring – reconnect loose wires, replace damaged components.
-
Check the drive motor and reducer – reconnect loose wiring; if internal failure occurs, call a professional for repair or replacement.
-
Check for chain jamming – readjust if necessary.
Q15: What to do if the fan motor does not work?
A15:Troubleshoot by:
-
Checking the three‑phase voltage supply.
-
Inspecting the electromagnetic switch coil and contact positions.
-
Testing the motor – if burned out, replace it.
Q16: What causes “no heating” and how to fix it?
A16:Check:
-
Temperature controller setting – readjust if incorrect.
-
Whether the fan motor has stopped – verify the three‑phase supply.
-
Electromagnetic switch coil and contacts.
-
Heating elements – replace if damaged.
Q17: How to handle abnormal noise from the machine?
A17: Investigate:
-
Chain rubbing against edges – realign.
-
Loose transmission parts (chains, pulleys) – tighten/adjust.
-
Bearings – if damaged, replace; if rusted, lubricate and improve maintenance.